Amlogic Burning Tool
Utility for flashing controllers based on Amlogic processors.
Preparing
Note
To correctly detect the controller during USB flashing, you need to install the driver CP210x USB to UART Bridge.
Download and install Amlogic Burning Tool for your device.
Connecting the device
The device must be connected with a USB cable to the PC for flashing.
The controller is also powered through this USB cable during flashing and it is not necessary to connect the main power supply.
Note
Some devices have more than one USB port.
Look in the documentation of your device to see which USB port the device is connected to for flashing.
Switching on and booting up the device
To flash the device, it must be booted into bootloader mode (update mode). This can be done in several ways:
As a rule, the device has a button for switching the loading mode. The button can be accessed through a hole in the housing. When turning on the device or rebooting it, it is necessary to hold this button pressed for 1-2 seconds from the moment the USB cable (power) is connected.
There are other ways to switch to bootloader mode (see documentation for your device).
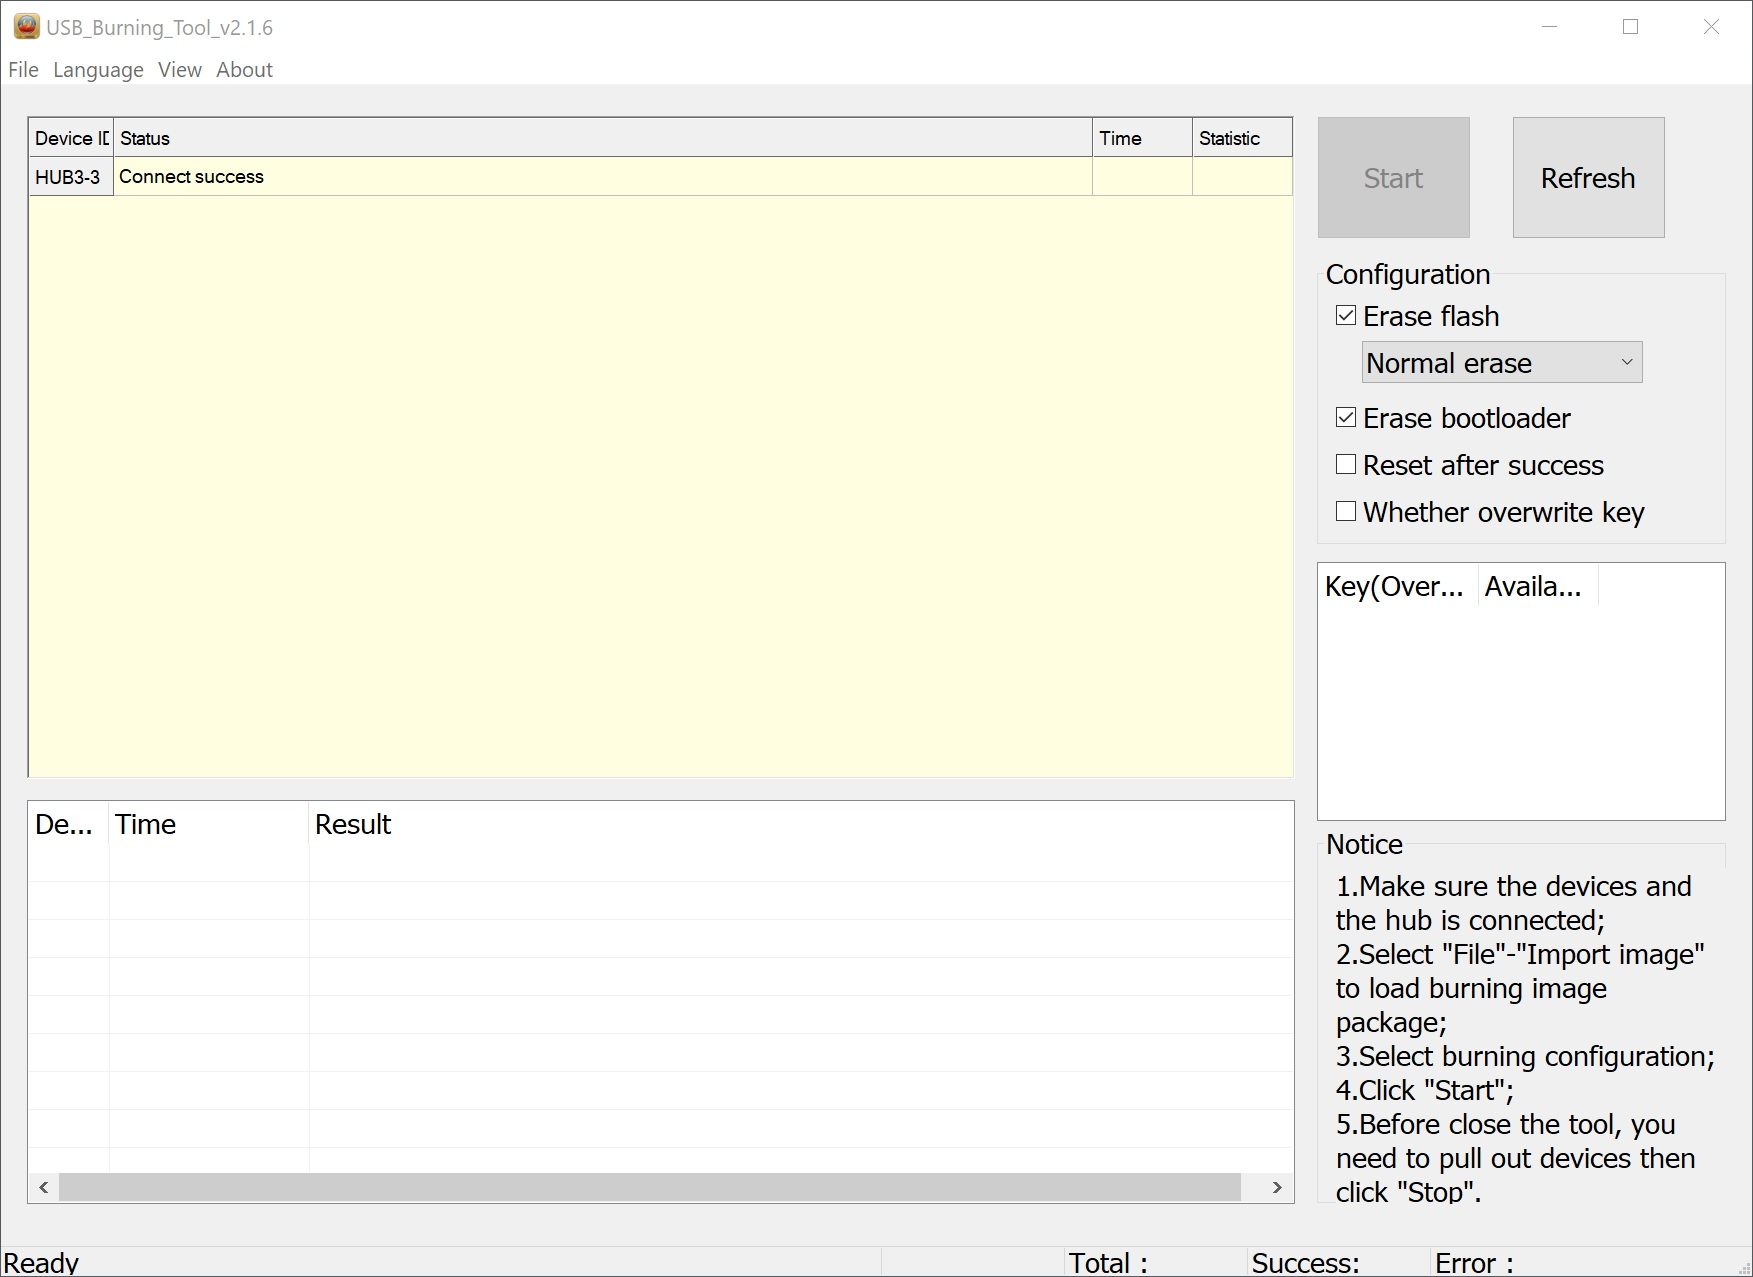
After the device is successfully connected to the PC and identified in the Burning Tool program, the following message will be displayed in the main program window: Connect success will be displayed in the main program window:
Selecting the software image for the firmware
Hint
You can find the current firmware image for your device here: JetHome firmware portal.
Open menu File → Import image and select the image to be flashed on the disk. The image will be checked, this may take a long time:
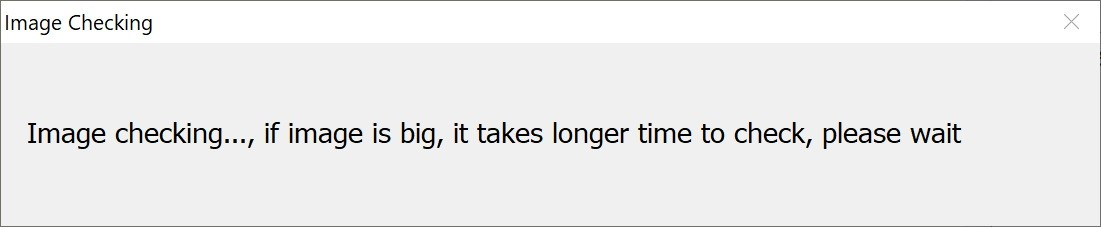
If no errors are found during the check, no message is displayed at the end of the check.
Image flashing
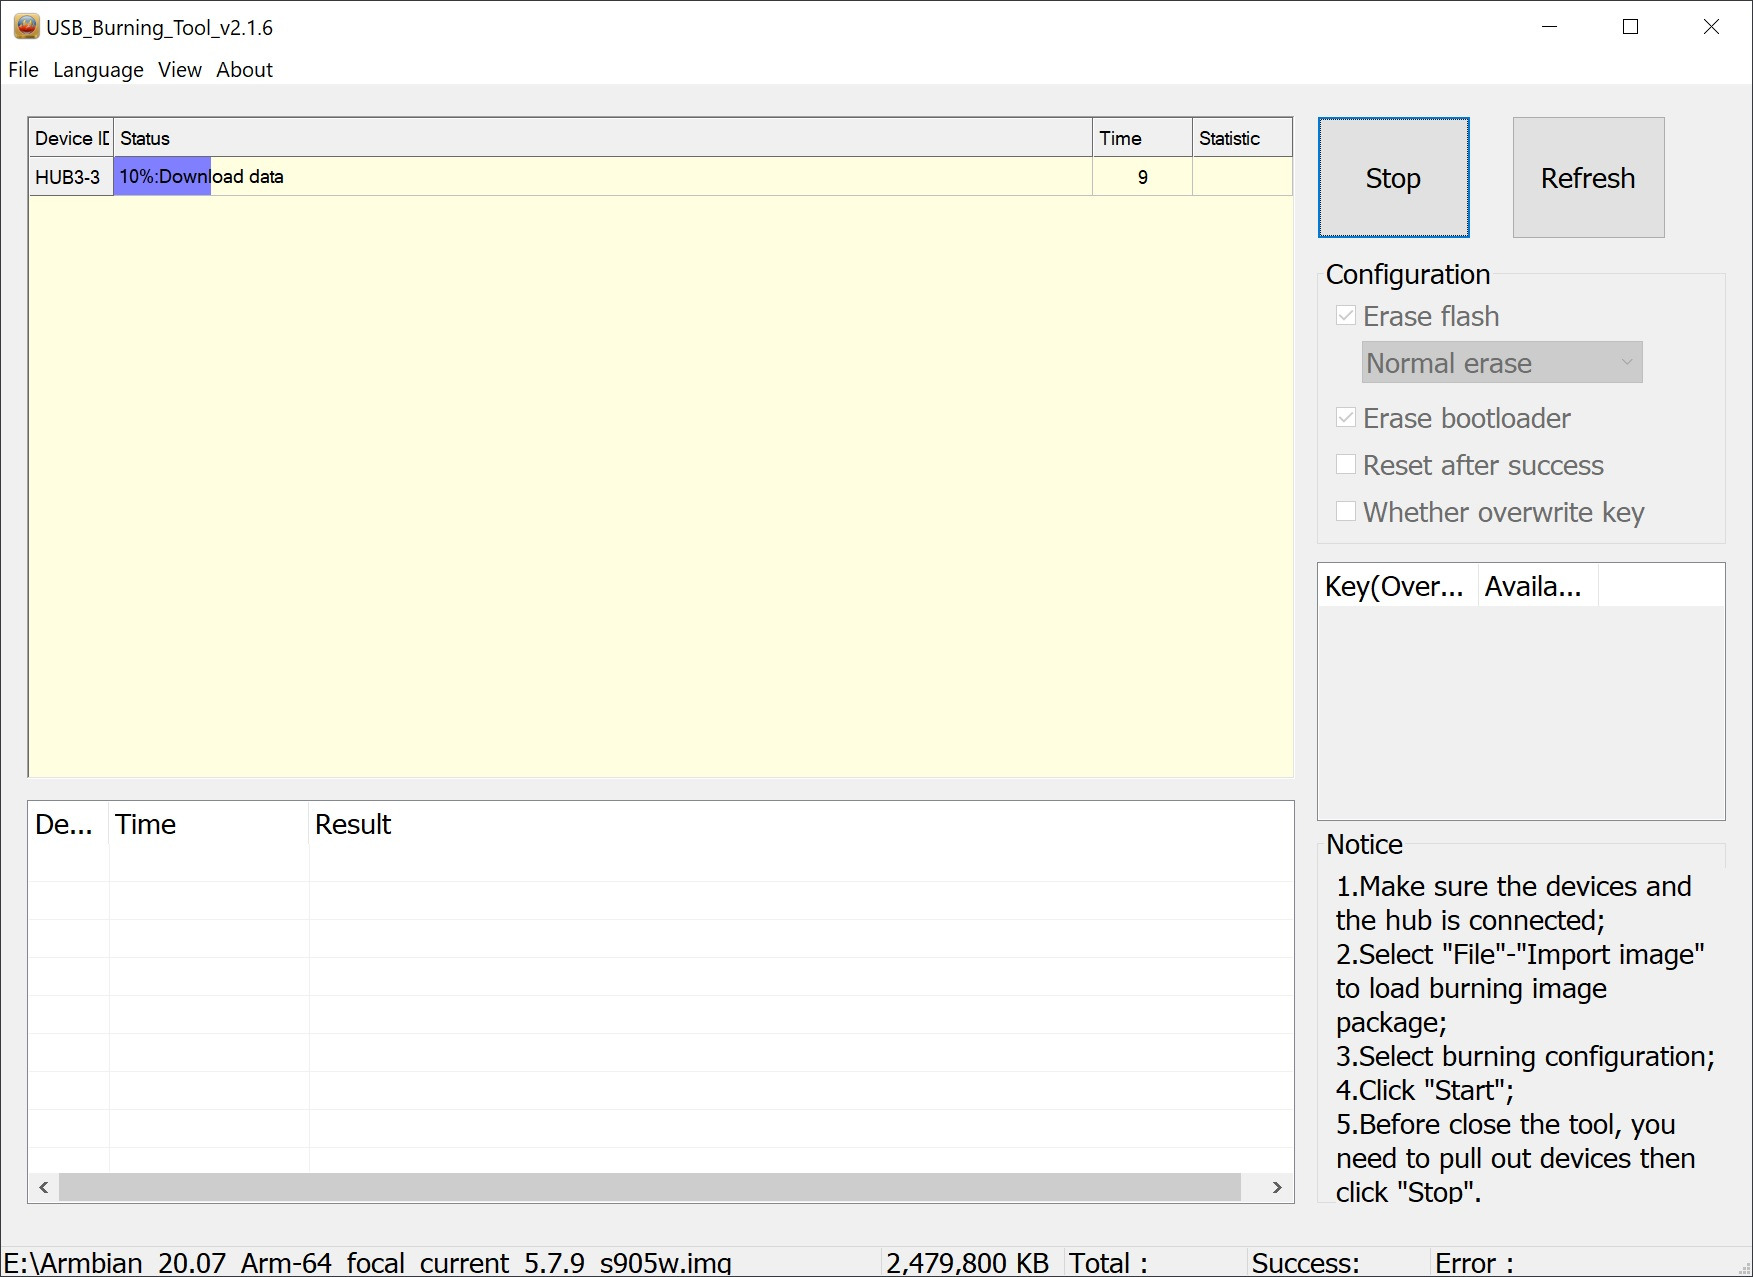
To start flashing the image, press the Start button in the upper right corner of the main program window. The flashing process will start.
Note
If there are errors when flashing the image, it is necessary to uncheck the Erase flash and Erase bootloader checkboxes before starting the flashing process.
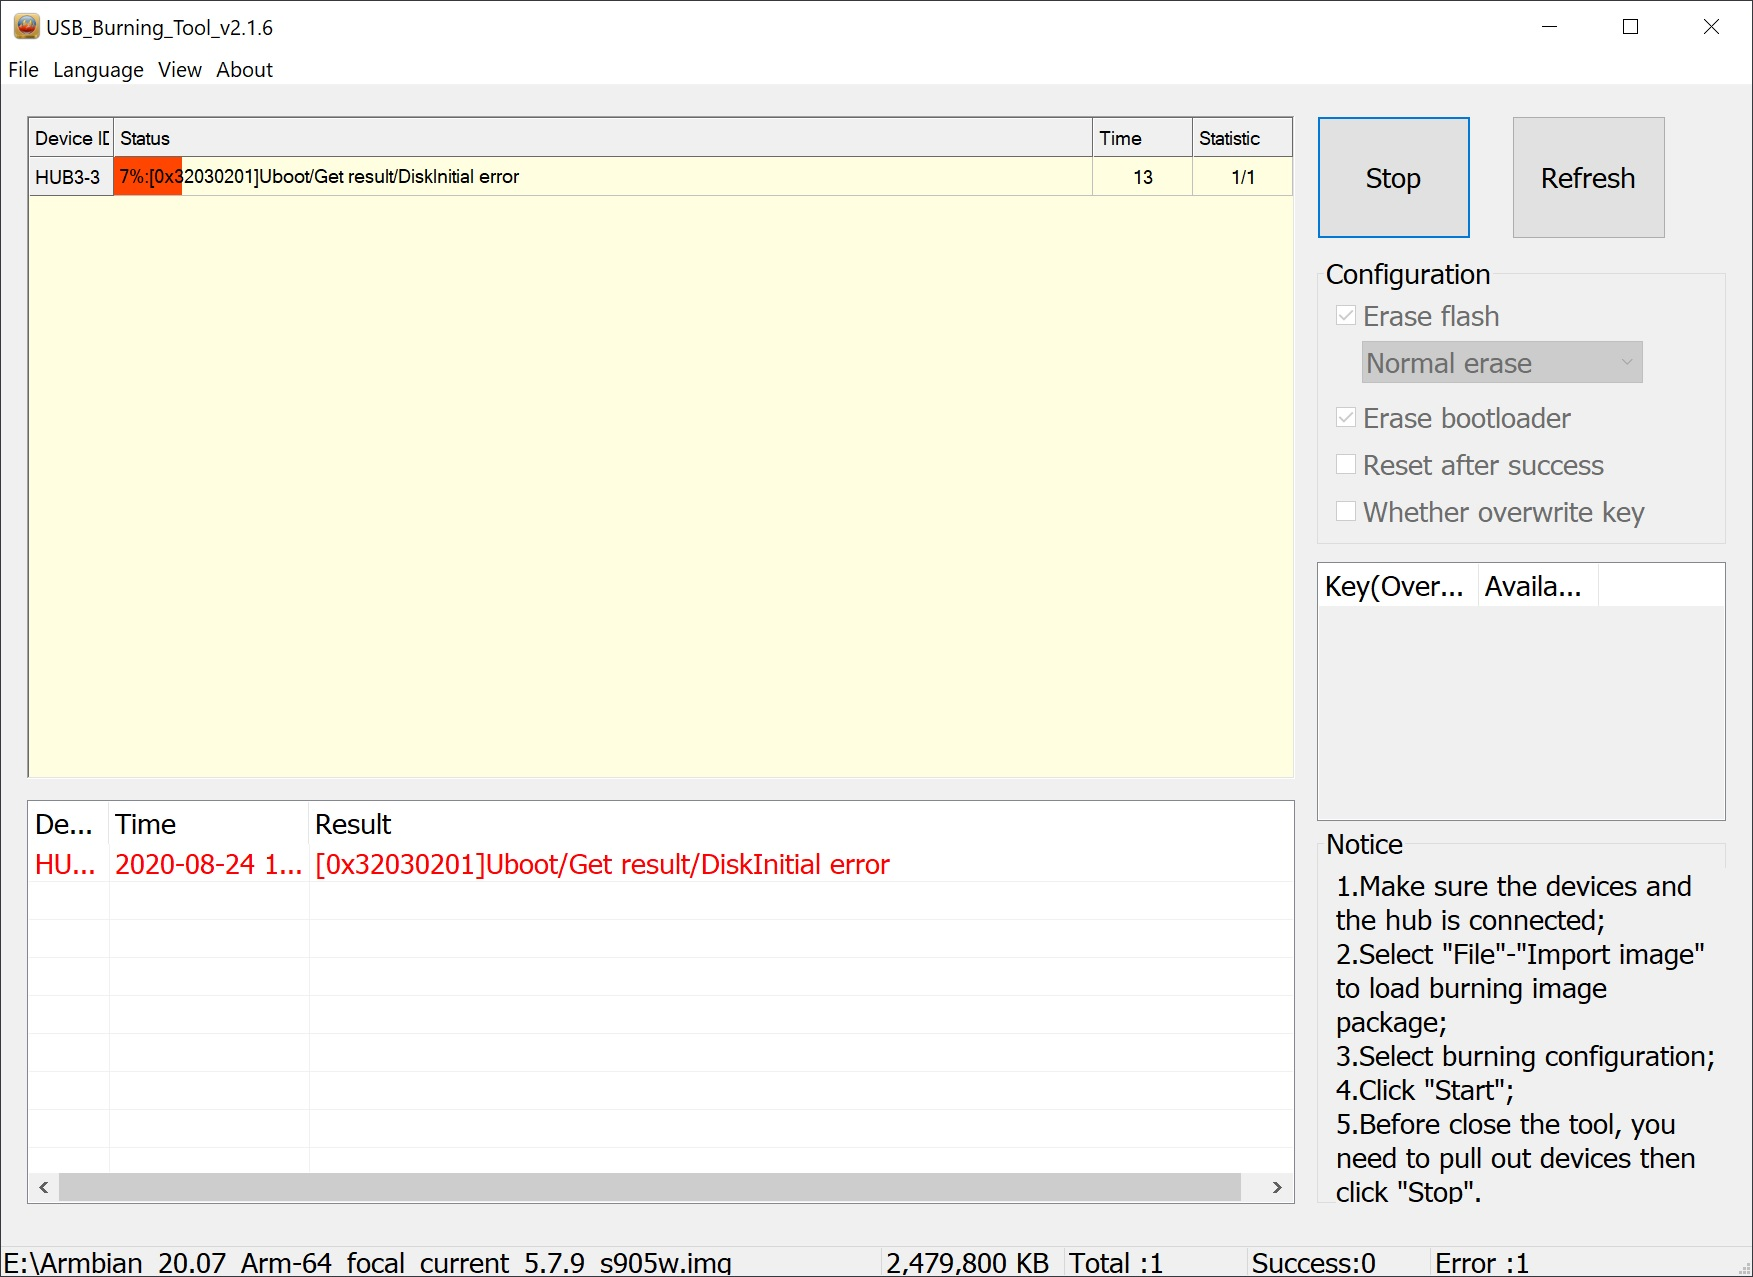
If an error occurs, the process is interrupted and a message describing the error will be displayed at the bottom of the program window:
When the flashing process is completed, a message will be displayed: Burning successfull:

After that you can press the button Stop, prohibiting the automatic start of the flashing procedure when you reconnect the device to the PC.